Setting up a home garage workshop transforms a neglected space into a functional sanctuary for projects, hobbies, and skill-building. Whether you’re a seasoned DIYer or just starting out, a well-organized workshop saves time, reduces frustration, and makes every project safer and more enjoyable. The beauty of a garage workshop is that it doesn’t require a massive budget or a sprawling space, just thoughtful planning. This guide walks you through assessing your space, selecting essential tools, organizing your layout, and ensuring your workshop is safe and comfortable year-round.
Table of Contents
ToggleKey Takeaways
- A home garage workshop doesn’t require a massive budget—just thoughtful planning, accurate space measurements, and clear project goals to maximize functionality.
- Start with essential tools including a solid workbench (48–72 inches), quality hand tools, and versatile power tools like a drill-driver and circular saw rather than trying to buy everything at once.
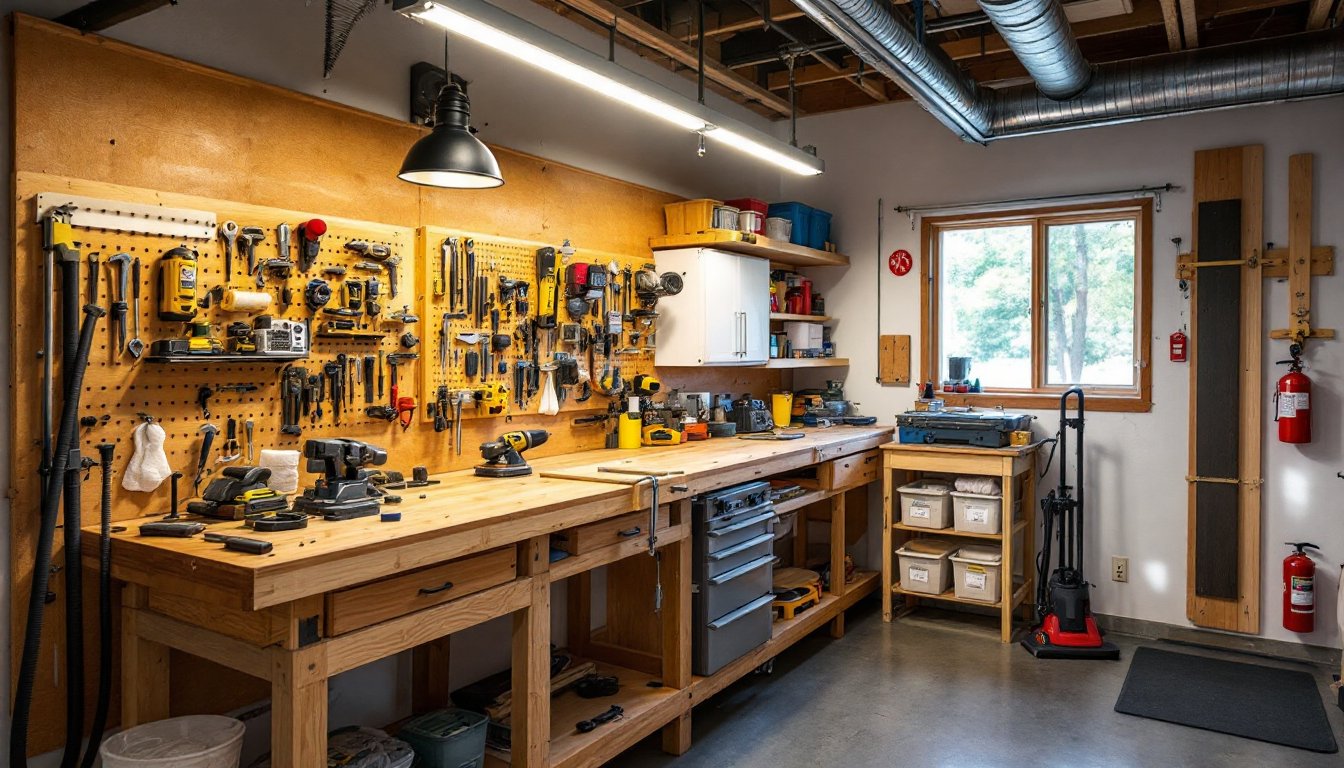
- Vertical storage solutions such as pegboards, French cleats, and wall-mounted racks are game-changers for keeping your garage workshop organized and maximizing usable floor space.
- Invest in proper lighting (LED shop lights at 4,000K), dedicated electrical circuits (20-amp), and ventilation systems to improve safety, precision, and tool longevity.
- Prioritize workshop safety by reading tool manuals, wearing appropriate personal protective equipment, maintaining clear exit pathways, and storing flammable materials in a fire-rated cabinet.
- Your workflow efficiency improves dramatically when you position your workbench strategically, group tools by function, take regular breaks, and use anti-fatigue mats during long sessions.
Assessing Your Space and Setting Goals
Before buying a single tool, measure your garage and identify what you want to build or repair there. Pull out a tape measure and note the total square footage, ceiling height, doorway dimensions, and the location of existing outlets, water lines, and support columns. A standard two-car garage runs about 400–500 square feet, but usable workshop space is often smaller once you account for parking, storage, and walkways.
Next, define your primary purpose. Are you building fine furniture, doing automotive work, tackling home repairs, or juggling multiple hobbies? This shapes everything from bench height (woodworking benches sit around 34–36 inches: automotive work tables often run lower) to power requirements and ventilation needs. Be honest about what you’ll actually use, a 10-foot band saw takes up serious real estate and isn’t necessary if you’re only crosscutting boards.
Consider your climate, too. Extreme heat, cold, or humidity can warp wood, rust tools, and make long hours miserable. If your garage gets toasted in summer or freezes in winter, budget for climate control from the start. Finally, check local codes: some jurisdictions require permits for garage workshops, especially if you’re adding circuits or modifying the structure.
Essential Tools and Equipment to Get Started
You don’t need every tool on the shelf. Start with the core essentials and add specialized gear as projects demand. A solid workbench (48–72 inches long, 24–30 inches deep) anchored to the wall is non-negotiable: it’s your command center. Pair it with a quality bench vise (4–5 inch jaws) for holding work steady.
For hand tools, begin with a 16-ounce claw hammer, a adjustable wrench set (6–10 inch), Phillips and flathead screwdrivers (multiple sizes), adjustable wrench, torpedo level, tape measure (25 feet minimum), and combination square. Add slip-joint pliers, locking pliers (Vise-Grips), and a utility knife. A rubber mallet is handy for assembly without marring wood.
For power tools, prioritize based on your projects. A corded or cordless drill-driver ($50–$150) handles 80% of fastening tasks. A circular saw ($60–$120) or miter saw ($100–$300) covers crosscutting and angled cuts. A random orbital sander ($80–$200) beats hand-sanding for finish work. A reciprocating saw ($60–$150) is invaluable for demolition and tight cuts. Consider Essential Garage Conversion Tools for deeper guidance on building-specific equipment.
Safety gear comes first: ANSI-rated safety goggles, nitrile gloves, dust masks or respirator (especially for sanding or finishing), and ear protection (NRR 20+ for loud tools). Don’t skip these, workshop injuries are both painful and expensive.
Creating an Efficient Layout and Storage System
Layout is about traffic flow and reaching what you need without climbing over clutter. Position your primary workbench against the longest wall, ideally near a window for natural light and away from the garage door (dust and drafts). If you’re doing automotive work, reserve an open floor area and keep the concrete clean and dry.
Group tools by function: hand tools near the bench, power tools on a wall-mounted pegboard or in a rolling cart, and materials stored by type (lumber vertical in a rack, fasteners in labeled bins, finishes in a cabinet away from ignition sources). Horizontal surfaces vanish under projects, so maximize wall and overhead space.
Maximizing Vertical Space and Organization
Vertical storage is a workshop game-changer. Install wall-mounted pegboards (adjustable hooks accommodate different tool sizes), French cleats (cut a 45-degree angle in wood strips, screw one to the wall, nail one to the back of shelves for rock-solid hanging shelves), or slat walls (horizontal strips fastened to studs, supporting custom brackets and hooks). Lumber storage racks mounted high on the wall free up floor space, and overhead ceiling joists can support a pulley system for rarely used items like ladders or seasonal decorations.
Label everything clearly with a label maker or masking tape and marker. Open bins let you grab what you need: closed cabinets protect finishes and electronics from dust. Designate zones: a finishing area away from the main work zone, a hardware corner with screws and bolts sorted by size, and a dust-collection station if you’re running a shop vacuum. Group similar projects together, keep all your woodworking reference books, router bits, and chisels in one area, separate from automotive fluids and tools.
Improving Lighting, Power, and Climate Control
Lighting is non-negotiable for precision work and safety. Overhead fluorescent or LED shop lights (4,000K color temperature mimics daylight) cast fewer shadows than incandescent bulbs and run cooler. A 2-light, 48-inch T8 LED shop light ($30–$50) covers roughly 200 square feet. Add a swing-arm work light or clip lamp ($15–$40) at your bench for detail work. Motion-sensor lights over storage areas save on electricity.
Power demands scale with your tools. A standard 15-amp garage circuit supplies one tool at a time safely: running a miter saw and dust collector simultaneously risks tripping the breaker. If you’re serious, run a new dedicated 20-amp circuit (or two) from your panel, this is a permit-required job in most jurisdictions, so hire a licensed electrician. Install GFCI outlets (ground-fault circuit interrupter) within 6 feet of any water source or floor, per NEC code. Mount outlets 36–48 inches up the wall for convenience.
Ventilation and climate control improve comfort and tool longevity. A shop vacuum ($100–$300) with a ceiling-mounted ductwork system removes fine dust: smaller portable dust collectors work for single-tool setups. For temperature extremes, a ceiling fan ($50–$150) improves summer airflow, while an unvented propane or ceramic heater ($100–$400) warms winter hours, ensure adequate ventilation if using unvented heaters, per local codes. Humidity control matters for woodworking: a basic dehumidifier ($150–$300) protects finishes and tools from rust.
Safety Considerations and Workshop Best Practices
Workshop safety starts with respect for tools and materials. Read tool manuals before first use: most power tools include critical guards and setup details. Never remove blade guards, kickback guards, or dust shrouds, they’re there for a reason. Tie back long hair, avoid loose clothing around spinning tools, and never reach near a moving blade.
Establish a shop safety routine: keep a first-aid kit in plain sight, post emergency contact numbers, and maintain clear pathways to exits and your circuit breaker. Store flammable liquids (finishes, solvents, fuels) in a locked fire-rated cabinet, away from heat sources and ignition. Keep a Class B fire extinguisher (rated for flammable liquids) nearby. Many DIYers overlook this until it’s too late.
Personal protective equipment (PPE) depends on the task. Eye protection is universal, a stray wood chip travels fast. Hearing protection (foam earplugs, $2–$10, or earmuffs, $20–$50) is essential when running loud tools above 85 decibels. Dust masks (disposable $0.50–$2 each) handle light sanding: respirators with P100 cartridges ($30–$60) are necessary for finishing work, epoxy application, or hazardous dust. Work gloves vary by task: leather for handling rough lumber, nitrile for finishing to avoid oils transferring onto your work, and cut-resistant gloves when handling sharp edges.
Resources like Family Handyman and The Handyman’s Daughter offer vetted guidance on safe practices and beginner-friendly projects. Invest in proper technique, your hands are irreplaceable. Before tackling unfamiliar work, watch tutorials or take a workshop class. Many community colleges offer woodworking and tool safety courses at reasonable rates: the knowledge pays dividends. Finally, Fix This Build That provides solid project planning advice to prevent costly mistakes.
Organize your workflow to minimize fatigue. Stand on anti-fatigue mats ($30–$80) during long sessions, they reduce strain on your feet and back. Keep frequently used tools within arm’s reach. Take breaks every hour or two: a tired DIYer makes mistakes. Stock your workshop with water and snacks: you’ll spend more time working and less time running inside.
Conclusion
A well-designed home garage workshop is an investment in your skills, your home’s value, and your peace of mind. Start small, plan thoughtfully, and build your tool collection and storage as projects evolve. Prioritize safety, lighting, and organization, these three pillars transform frustration into flow. With honest self-assessment, smart tool choices, and respect for the work, your garage becomes a space where projects get done right.