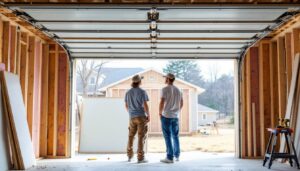
A garage workshop is your launchpad for every DIY project, from furniture building to home repairs. Whether you’re a weekend hobbyist or someone serious about woodworking, having a well-designed workspace transforms what’s possible in your home. The difference between a cluttered garage and a functional workshop comes down to planning, smart tool selection, and smart storage. This guide walks you through the essentials, layout, tools, storage, lighting, safety, and budget hacks, so you can build a workshop that actually works.
Table of Contents
ToggleKey Takeaways
- Start your garage workshop with five essential tools—cordless drill, miter saw, speed square, tape measure, and clamps—which cover 80% of most DIY projects without overwhelming your budget.
- Proper layout planning is critical: divide your workspace into three functional zones (assembly, storage, and finishing) to maximize workflow and prevent wasted movement.
- Vertical storage solutions like pegboard, shelving, and wall-mounted organizers are more space-efficient than stacking items and help you stay organized while avoiding duplicate tool purchases.
- Invest in quality lighting (at least 50 foot-candles on work surfaces), ventilation with a shop vacuum, and safety equipment like eye protection and dust masks to protect your health and prevent accidents.
- A functional garage workshop can start at $1,500–$2,500 by purchasing tools as projects demand them and leveraging second-hand tools, recycled lumber, and sales rather than buying everything upfront.
- Build your workshop incrementally based on actual project needs, allowing your space to evolve with experience rather than trying to create the perfect setup from day one.
Planning Your Garage Workshop Layout
Assessing Your Available Space
Before you buy a single tool, measure your garage honestly. Standard two-car garages run about 20×20 feet, but yours might be tighter if you’re storing vehicles or keeping space for parking. Measure wall-to-wall, floor to ceiling, and note any obstructions, furnace, electrical panel, water heater, or windows that affect workbench placement.
Draw your garage to scale on graph paper or use a free tool like SketchUp. Mark fixed obstacles and vehicle space (if you’re keeping cars). This isn’t about being precious: it’s about understanding what real estate you actually have for working. A lot of workshop failures happen because someone crammed a 4-foot workbench into a space that only leaves 18 inches on either side.
Creating Functional Zones
Divide your workshop into three basic zones: assembly (where you’ll build), storage (tools and materials), and finishing (paint, stain, cleanup). These don’t need hard lines, just logical flow so you’re not dragging wood across the room to find a miter saw.
Your main workbench should sit against a wall with good natural light and near an outlet. Tools you use daily, circular saw, drill, tape measure, should be arm’s reach from where you’re working. Materials storage goes against the opposite wall or along one side. Finishes, dust, and mess get isolated to a corner away from your assembly area. If you’re doing automotive work or messy projects, keep those as far as possible from where you’ll store finished pieces.
Essential Tools And Equipment For Beginners
Start with the basics, not a wall full of everything. A beginner needs: cordless drill-driver, miter saw or circular saw, speed square, tape measure (25-foot minimum), clamps (you’ll want at least four), and a workbench. These five cover 80% of garage projects.
Add a orbital sander, nailer (pneumatic or cordless), and stud finder as you grow. Don’t buy a air compressor unless you’ve committed to pneumatic tools, they’re another beast entirely. A multi-tool is genuinely useful for detail work and cuts-in tight spaces that saws can’t reach.
Force yourself to buy quality basics over quantity of junk. A $60 DeWalt drill outperforms a $30 no-name drill that’ll frustrate you and break. Tools like essential garage conversion tools are worth researching before investing. Used tools can save money if you know what to look for, check the movement of chucks, spin of drill bits, and whether the motor sounds clean and strong.
Eye and ear protection aren’t optional. Grab a pack of safety glasses, work gloves, and hearing protection rated for your tools. A particulate mask (P100 rated) is essential when sanding or sawing. Dust isn’t just annoying, it’s a long-term lung hazard. Keep a first aid kit visible and a fire extinguisher mounted on the wall near your work area.
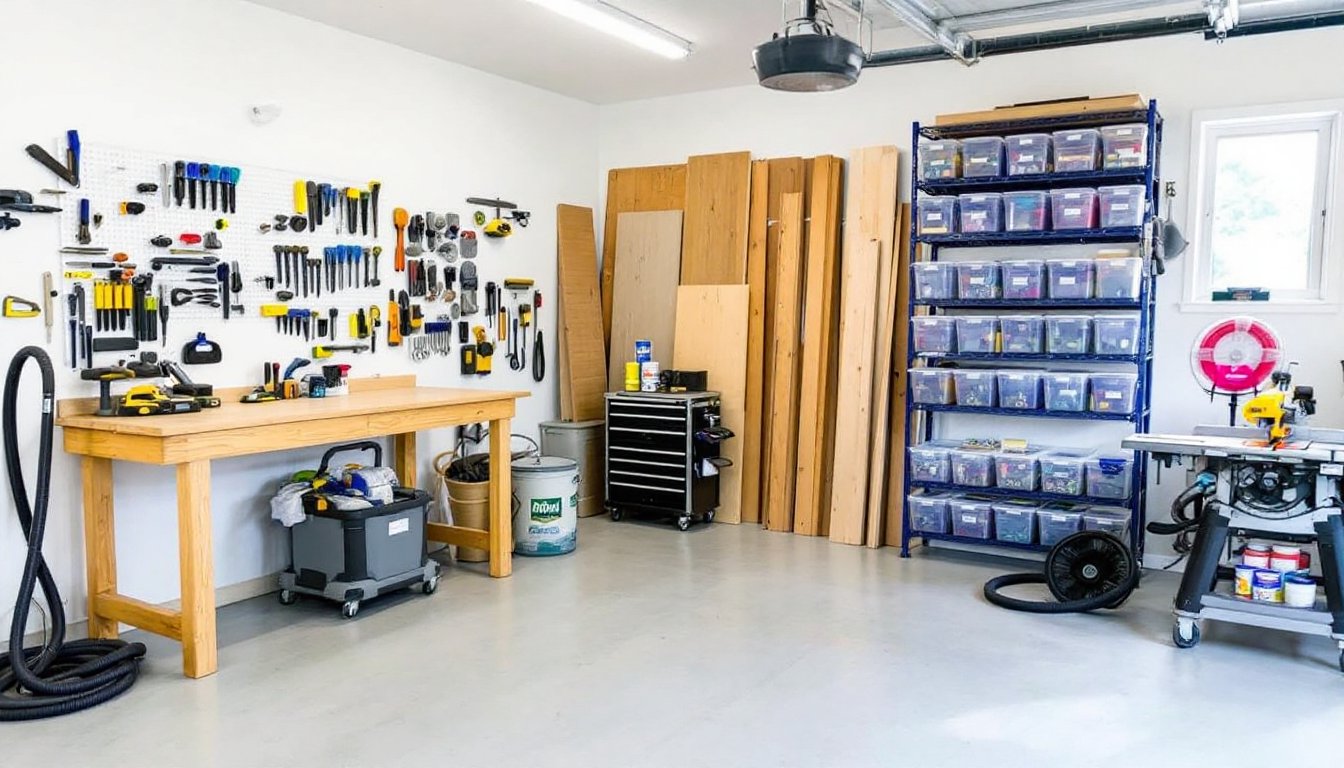
Storage Solutions That Maximize Space
Vertical storage is your friend in a garage workshop. Wall-mounted pegboard, French cleats, or heavy-duty shelving units hold tools without eating floor space. A single wall of 24-inch deep shelving running 8 feet wide holds an incredible amount and costs less than $200 for sturdy metal units.
Label everything. Seriously. Use clear plastic bins for fasteners, hardware, and small parts, you’ll find what you need in seconds instead of dumping three boxes on the workbench. A rolling cart under your main workbench slides out for cleanup and slides back for storage. Over-the-door organizers hold drill bits, screwdriver sets, and sanders.
For lumber, build a simple 2×4 rack against one wall. It’s four vertical studs bolted to the wall studs, with cross-braces every 12 inches to hold boards flat and sorted by size. This keeps wood organized, protected from warping, and accessible. Material storage matters because wood that’s been properly stored and acclimated to room temperature gives you better results in projects. Top garage conversions often showcase intelligent workspace organization that makes building efficient.
Don’t pile things on top of other things. Stack is enemy to function. A well-organized garage costs less to equip because you stop buying duplicates of tools you forgot you owned.
Lighting, Ventilation, And Safety Essentials
Bad lighting kills projects and causes accidents. Overhead fluorescent fixtures alone aren’t enough, shadows hide what you’re doing. Install LED shop lights in strips or panels ($30–$80 each) along the ceiling and over your workbench. Aim for at least 50 foot-candles of light on work surfaces: a lux meter app (free on your phone) can measure this roughly.
Clip-on work lights ($15–$30) on your bench give task-specific brightness when needed. Don’t be cheap here, proper lighting saves mistakes and makes long sessions less tiring.
Ventilation matters more than most DIYers think. Dust, fumes from paint or stain, and sawdust buildup aren’t just messy, they’re health hazards. A shop vacuum ($100–$300 depending on size) is non-negotiable. Pair it with a dust collection system on your miter saw or table saw. For finishing work, crack a window and use a box fan pulling air out. Better yet, a window-mounted exhaust fan ($80–$150) gives you dedicated ventilation without using electricity from a general outlet.
Floor safety: Sawdust and wood shavings are slip hazards when wet. A simple concrete sealer or anti-slip floor coating prevents puddles and keeps you from eating concrete if you step wrong. Keep a clear path from your entry to your main work area.
Electrical safety is critical. Never daisy-chain power strips, it’s a fire hazard. Run a dedicated 20-amp circuit with outlets spaced 6 feet apart if possible. Plug high-draw tools (dust collectors, air compressors, planers) into their own outlets. A GFCI outlet ($12–$20) near sinks or water sources protects against electrocution.
Building Your Workshop On A Budget
You don’t need $10,000 to start. Most useful workshops begin around $1,500–$2,500 and grow from there. Buy tools as projects demand them, not all at once.
Wall-mounted storage beats expensive wall-board cabinets. A length of peg board ($20) and a set of hooks ($30) do what a cabinet costing $300+ does. Reclaim lumber for workbench frames if you can find straight pieces from a remodel or deconstruction site. Factory-direct suppliers often have deals on tools if you wait for sales, Black Friday and Boxing Day aren’t just for retail.
Second-hand tools from pawn shops, estate sales, or Facebook Marketplace can be 50% cheaper. Inspect carefully: test the motor, check for damage, verify all parts move freely. A used DeWalt miter saw in good shape beats a new budget-brand saw every time. Resources like popular mechanics DIY guides often review tool value and longevity, helping you avoid expensive mistakes.
Start with hand tools before power tools. A hand plane, chisel set, clamp set, and hand saw ($200 total) let you complete solid projects before you commit to expensive equipment. You learn control and technique, and you save money. Woodworking plans and furniture guides often highlight projects that work beautifully with basic hand tools plus one or two power tools.
Material cost varies wildly by region and market. Budget plywood at $40–$60 per sheet, hardwood at $8–$15 per board foot, and fasteners in bulk to save. Always buy a little extra, mistakes happen, and ordering more later costs shipping. Compare prices at big-box stores versus lumber yards: specialty yards often have better quality and sometimes better pricing on specific items.
Bringing It All Together
A garage workshop doesn’t need to be fancy or massive, it needs to be functional. Start with your layout. Nail down where your main workbench lives, where tools hang, and where materials rest. Install lighting and ventilation. Buy the five core tools. Set up vertical storage. Then build from there as projects demand.
The workshops that last are the ones built incrementally by people who actually use them. Every time you finish a project, you learn what worked and what didn’t. Maybe you realize you need more clamping power. Maybe you discover a corner would be better as finishing space than storage. This is normal, your workshop evolves.
Start this weekend. Measure, organize what you have, and commit to one quality tool purchase. In six months, you’ll have the foundation for years of builds.