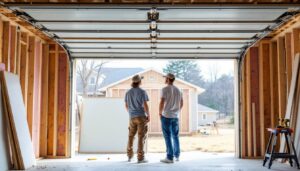
Converting a garage to an apartment is one of the smartest ways to add rental income or guest space without building an addition. Whether you’re looking to create a studio apartment, ADU (accessory dwelling unit), or long-term rental, a garage apartment conversion maximizes your property’s potential. The good news? With proper planning, the right permits, and methodical execution, a homeowner with DIY experience can tackle much of this project themselves. This guide walks you through every phase, from initial permits to final touches, so you understand what’s involved, when to call a pro, and how to avoid costly mistakes that plague garage conversions gone wrong.
Table of Contents
ToggleKey Takeaways
- Obtain permits early and verify zoning laws with your local building department before starting a garage conversion to apartment—this 30-minute conversation prevents months of wasted work and costly violations.
- Hire licensed contractors for electrical, plumbing, and structural work, but DIY insulation, drywall, flooring, and finishing touches to recover significant labor costs.
- Design your garage apartment layout with utilities in mind: place kitchens and bathrooms near existing drain lines, bedrooms away from exterior doors for privacy, and plan for two egress windows in sleeping areas for code compliance.
- Install proper insulation (R-13 minimum walls, R-30 attic) and a heating/cooling system like a mini-split heat pump ($3,000–$6,000) to create a comfortable, livable space and protect your investment.
- A garage apartment conversion maximizes your property’s potential by adding rental income, guest space, and home value without the cost of building an addition.
Planning and Permits: Getting Started on the Right Foundation
Before you move a single piece of drywall, sit down with your local building department. This isn’t bureaucratic theater, permits exist because converting a garage involves structural, electrical, and safety considerations that directly affect your home’s integrity and resale value.
Start by checking zoning laws. Many municipalities restrict ADUs or rental units in residential zones, cap them by square footage, or require owner occupancy. Some areas demand setbacks from property lines or impose parking requirements. A 30-minute conversation with your zoning office saves you months of wasted work. Request written confirmation of what’s allowed: email trails beat assumptions.
Next, understand what triggers a permit in your area. Most jurisdictions require permits for:
- Converting living space (changing use classification)
- Adding electrical circuits or changing service panels
- HVAC installation or modification
- Plumbing runs or fixture additions
- Structural work (removing walls, adding header beams)
Cosmetic work, painting, flooring, installing shelves, usually doesn’t need a permit, though some jurisdictions are stricter. Cosmetic mistakes are fixable: structural or electrical violations can trigger costly remediation orders or insurance denial claims.
Budget 4-8 weeks for the permit cycle. Inspectors will flag incomplete work, and resubmissions are common. Plan your timeline accordingly. Costs vary wildly by jurisdiction (expect $200 to $2,000+), but they’re a bargain compared to un-permitted work liability.
Design and Layout Essentials for Your New Living Space
A garage apartment conversion to apartment living demands smart spatial planning. A typical two-car garage is around 400–500 sq. ft., tight for a one-bedroom but workable for a studio or one-bed with thoughtful layout.
Maximizing Small Footprints and Creating Distinct Zones
Start by mapping where plumbing and HVAC will run. These systems dictate furniture placement more than aesthetics. Locate the kitchen and bathroom near existing drain lines (usually a corner of the original garage) to minimize costly pipe runs. Place the bedroom or sleeping zone farthest from exterior doors and windows to maximize privacy and thermal mass.
Open-plan layouts feel larger but sacrifice acoustic separation. If you’re renting, a defined bedroom (even a small one) commands higher rates than a studio. Use half-height room dividers or sliding barn doors to define zones without blocking sight lines entirely.
Height matters too. If the garage has an 8-foot ceiling and you’re installing HVAC ductwork, your clearance shrinks fast. Aim for 7’6″ minimum finished ceiling height: anything lower feels cramped and may violate codes. Some builders drop ceilings strategically over kitchen or bathroom zones and leave the main living area at full height, a technique that visually expands the space.
Windows and doors are critical. Bedrooms typically require two means of egress (one window sized for fire escape). This is non-negotiable for safety and code compliance. Plan window locations during design, not mid-construction. Garage Conversions for Beginners: A Step-by-Step Guide can help clarify code-compliant layouts if you’re new to residential standards.
Building Systems: Utilities, HVAC, and Climate Control
A detached or semi-detached garage apartment needs its own utilities. This is structural work that demands professional involvement, even if you’re handy.
Electrical service typically requires a licensed electrician. You’ll likely need a subpanel (a secondary breaker box tied to your home’s main service) rated for the apartment’s load. A 100-amp subpanel is standard for a small apartment: prices run $600–$1,200 installed. Running new circuits to outlets, switches, and fixtures should follow the National Electrical Code (NEC). Undersized wiring or overloaded circuits are fire hazards and insurance red flags.
Plumbing is equally critical. New bathrooms and kitchens need drain stacks (vertical pipes that tie into your home’s sewer or septic line), fresh water lines from your main supply, and proper venting. Frozen pipes are a real risk in cold climates if the apartment isn’t heated year-round. Insulate exposed supply lines with foam pipe sleeves or heat tape. A licensed plumber typically handles rough-in: you can run trim work (visible pipe covers, faucet installation) once the infrastructure is proven leak-free.
HVAC is non-negotiable. A garage (especially a detached one) lacks the thermal envelope of a house. You need heating and cooling. Options include:
- Mini-split heat pump (most popular for small conversions): Compact wall-mounted units that heat and cool. Prices: $3,000–$6,000 installed. Energy-efficient and quiet.
- Ductless units with insulated refrigerant lines running through the exterior wall.
- Extending existing HVAC: If your home has capacity, running ducting from the main system to the apartment is cheaper but requires ductwork installation and may strain your existing furnace/AC.
Minimum insulation (R-13 walls, R-30 attic) is required by most codes: in cold climates, expect R-19 to R-21 walls and R-38+ attics. Without proper insulation, you’re heating the neighborhood, not the apartment. This Old House has solid HVAC guides if you want to understand the mechanics before hiring a contractor.
Insulation, Drywall, and Interior Finishing
Once utilities are roughed in and inspected, you can begin insulation and drywall, the phases where DIY effort saves real money.
Insulation comes in batts (fiberglass rolls), blankets, or spray foam. Batts are the cheapest and easiest for DIYers: unfold them between wall studs (typically 16 inches on center) and staple flanges to the stud edges. Wear a dust mask and gloves, fiberglass is itchy. For the floor, if the garage sits above a crawlspace or is unheated below, install rigid foam or batt insulation between floor joists before laying subfloor. Attic insulation is straightforward: lay batts between rafters perpendicular to the joists, overlapping seams.
Drywall (also called gypsum board or sheetrock) is the standard interior finish. Sheets are typically 4′ × 8′ and come in 1/2″ or 5/8″ thickness. A team of two can hang drywall on a 400-sq.-ft. space in 2–3 days. You’ll need a drywall lift (rent for $20–$30/day), a utility knife, a t-square, and a drill with a drywall screw bit. Fasteners are crucial: space drywall screws 12″ apart on studs and 16″ on ceilings. Undersized fastener spacing causes pops (nails popping out months later).
Taping and mudding (applying joint compound over seams and screw holes) is the tedious part. It requires patience and multiple coats (typically 3): a base coat, a fill coat, and a finish coat. Each coat must dry and be sanded before the next. Many DIYers skip the final sand or rush drying, resulting in visible seams under paint, plan for a week of drying time between coats. For a professional finish, hire a drywall finisher: for acceptable results, YouTube tutorials combined with practice work. Prime all drywall with a primer-sealer before painting.
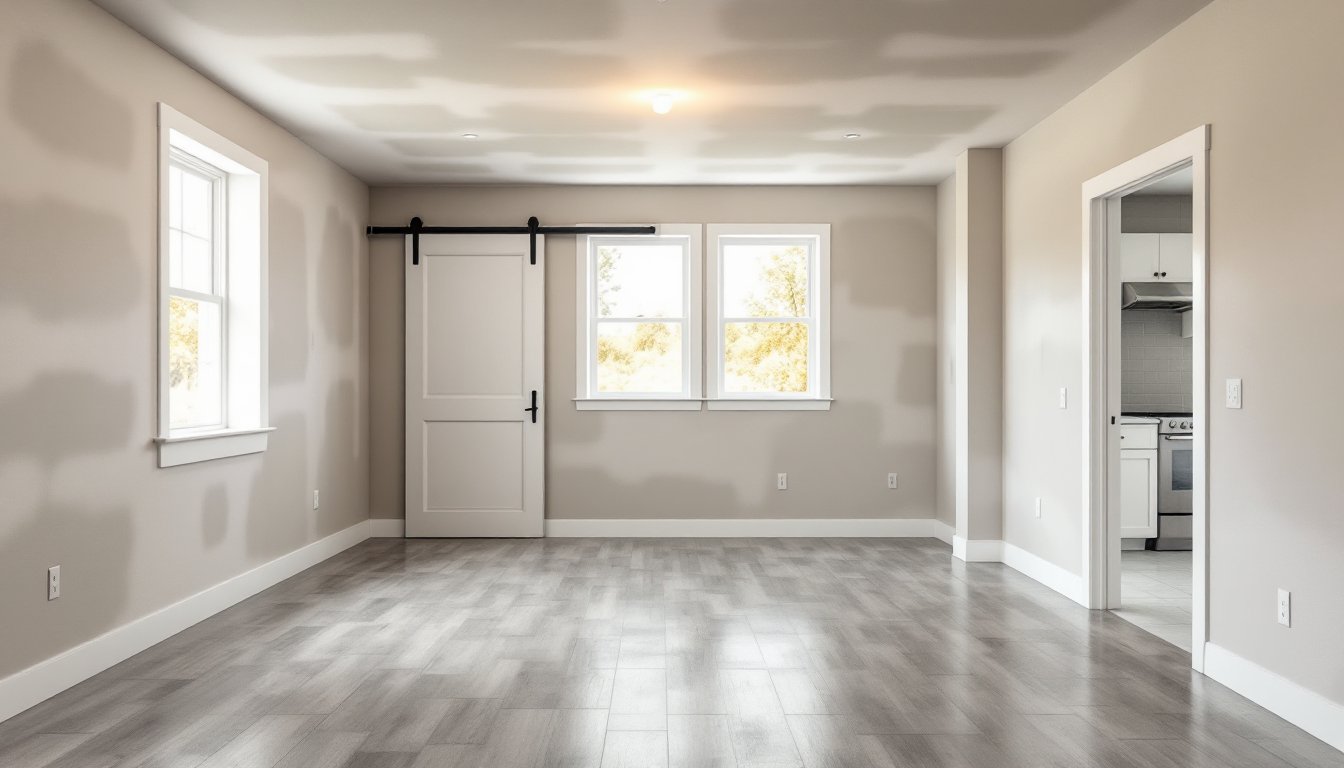
Flooring, Lighting, and Decor to Complete Your Space
Flooring sets the tone and durability of your apartment. Concrete (the garage’s original floor) is cold, dusty, and uninviting: cover it. Options include:
- Vinyl plank flooring (LVP): Waterproof, durable, easy to install with floating systems. $2–$5/sq. ft. installed by DIY.
- Laminate: Cheaper but not moisture-proof: risky in kitchens or bathrooms.
- Ceramic or porcelain tile: Durable and water-resistant, especially in bathrooms. Professional installation recommended: grout lines trap dirt without proper sealing.
- Carpet: Soft underfoot but traps allergens and stains easily in small spaces.
Before installing any flooring, address the concrete. It must be clean, level, and dry. Pour a concrete sealer if moisture wicks up. Level high spots with a self-leveling compound or grind them down: dips wider than 3/16″ per 10 feet cause hollow spots under flooring and shortened lifespan.
Lighting transforms a dark garage into a livable apartment. Natural light is limited (you likely added one or two windows), so artificial light is essential. Recessed lighting (canned lights spaced 4–6 feet apart) provides even ambient light: a dimmer switch gives control. Task lighting over the kitchen and bathroom mirrors adds function. Pendant lights or a small chandelier in the living area add character without overhead glare. All of this is straightforward wiring if the electrical rough-in is complete.
Paint and finishing touches are final confidence boosters. Light colors (soft whites, pale grays, warm creams) expand perception of small spaces. Avoid dark colors and heavy textures unless you’re designing for a specific aesthetic that justifies the tradeoff. Two coats of quality interior paint ($30–$50/gallon) over properly primed drywall ensures durability and clean aesthetics. Essential Garage Conversion Tools covers brushes, rollers, and sprayers if you’re tackling paint yourself. Top Garage Conversions to Maximize Your Home’s Potential showcases finished projects that inspire smart design choices. For cost planning and timelines, ImproveNet offers project cost guides and contractor referrals if you need to outsource phases.
Conclusion
A garage apartment conversion is achievable for homeowners with solid DIY skills and realistic expectations about what requires professional licensing. Permits, structural work, electrical, and plumbing are non-negotiable, hire licensed contractors for these. Insulation, drywall, flooring, and finishing touches are DIY-friendly and where you recoup labor costs. Plan thoroughly, pull permits early, and don’t cut corners on building systems. A well-executed garage conversion adds livable square footage, rental income potential, and home value, making it one of the smartest investments a homeowner can make.